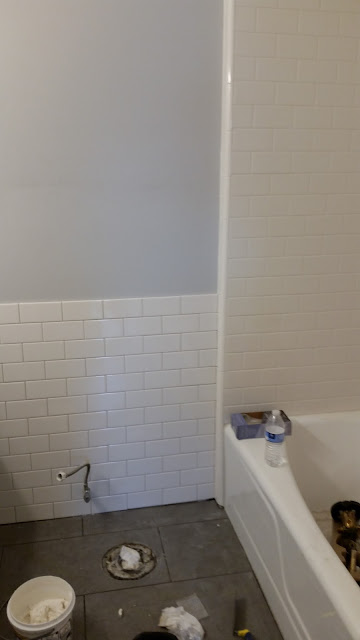
Just to give you an idea of what we were dealing with in our bathroom renovations let me show you some before pictures.
We decided to keep the original bath tub and vanity to save some money and that's basically all that we kept.
The window above the toilet actually went to another room, not outside so we decided that needed to go. The door to the bathroom had been enlarged for wheelchair access (we think) so we had to change the door frame as well.
Removing wallpaper is such a pain! I vow to never, ever put up wallpaper. I don't care how in style it is I will NOT do it.
The hardest part was probably ripping out all the tile from the shower and the floor.
If you ever demo a bathroom I recommend using power tools, ear plugs and safety glasses. Pieces of tile can chip off and fly at you. I am just glad my brother in law was there to help and to tell me what to do.
As you can see the demolition part can get quite messy! With me, my dad and Brother in law it took about a day to demo the bathroom.
Once the trim and glass from the window were out Travis had to build a frame for the window and then had to sheetrock it.
The tile and stone work were installed by the local Utah company Millstream Tile and Stone. The cool thing is, I happen to know the owner and he let me help out with some of the tile since I have never done that before.
If you need any tile or stone work done I highly recommend Millstream Tile and Stone!
I don't have pictures from my painting progress but let me tell you, we started with a generic ceiling paint that was tinted pink when wet so you could see where you had painted. Sounds great right? Wrong! This particular paint takes almost 30 days to completely cure which means any moisture in the room will turn the ceiling pink, it's kind of a pain. From there I painted the walls and vanity.
My tile guy suggested adding the tile on the wall behind on the toilet. I am so glad he did, it gives it a real finished look. He also did the custom marble counter. The pictures just don't do it justice.
We also added new hardware to the cupboards and drawers. The mirror was a basic mirror from Home Depot that Travis added the frame to.
I didn't get a picture of the lights but this is what they look like.
Paint: Glidden Universal Grey
Tile: Subway tile from Home Depot
Flooring:Mitte Gray tile from Lowe's
Sink: Decolav rectangle under mount sink from Home Depot
Light: Hampton Bay
Plumbing fixtures: Pfister


It looks great! I love the subway tile.
ReplyDeleteWow, that is a huge improvement! I can't wait to see more from your new house.
ReplyDeleteLooks stunning.
ReplyDelete